The Student News Site of Rock Bridge High School

Bearing News

The Student News Site of Rock Bridge High School

Bearing News

The Student News Site of Rock Bridge High School

Bearing News

12 DIYs: Wrapping paper origami stars

12 DIYs: Wrapping paper origami stars

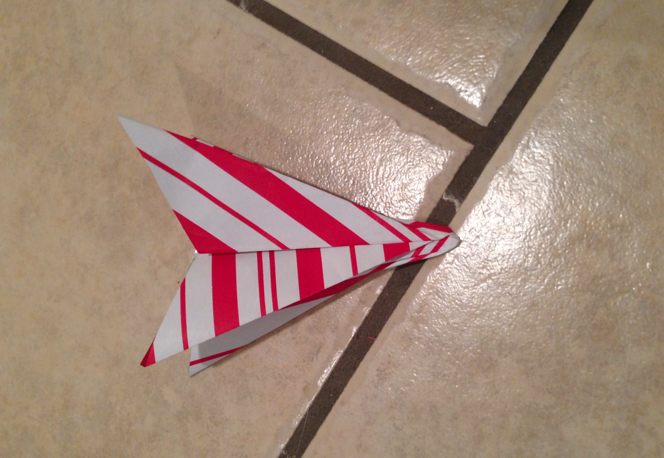
You might have some extra wrapping paper laying around your house with no use if you’ve already wrapped all your presents. Don’t throw it away because it’s perfect to use for origami! By cutting the wrapping paper in squares, it can be used to make paper crafts that can make cute displays, ornaments or even small gifts.
You will need:

  • Scissors
  • Tape measure/ruler
  • Wrapping paper

How to make it:
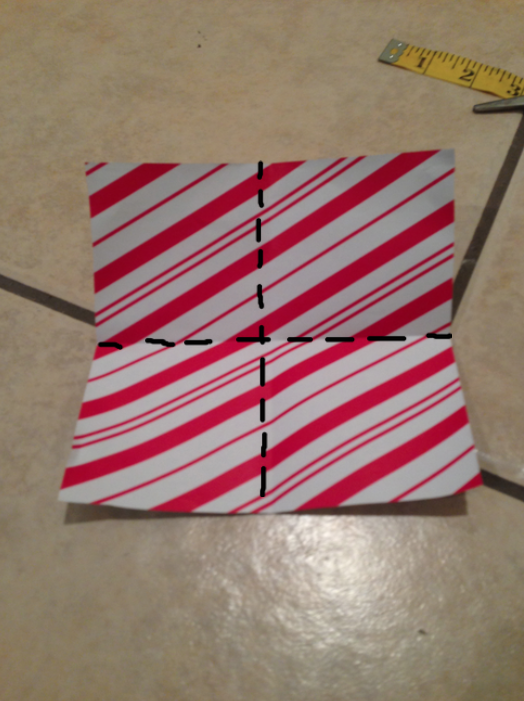
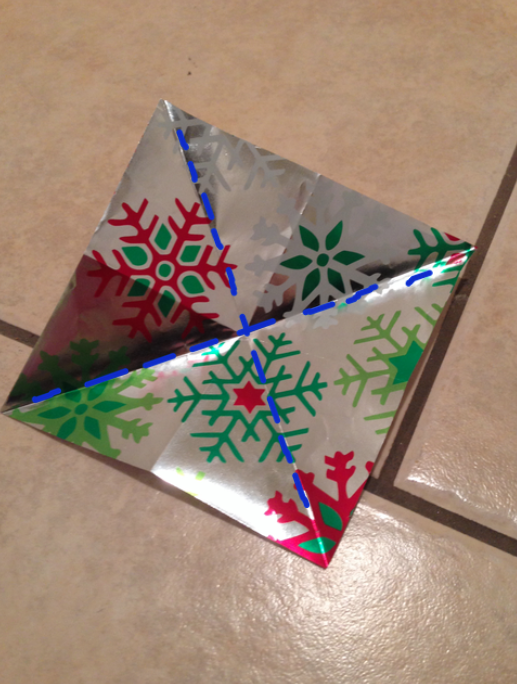
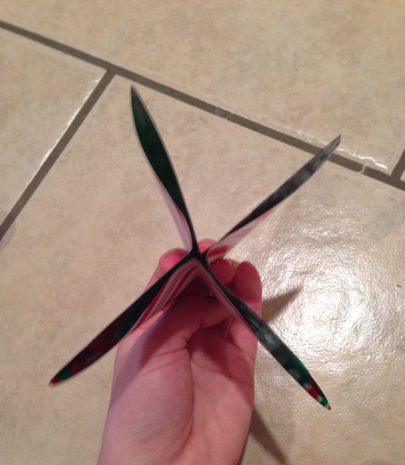
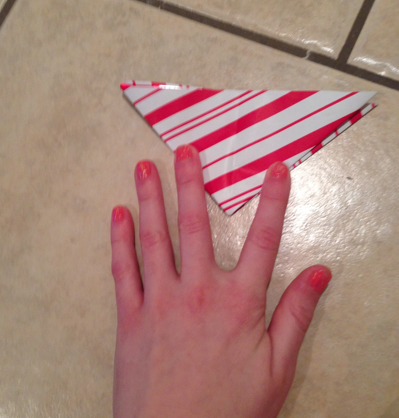
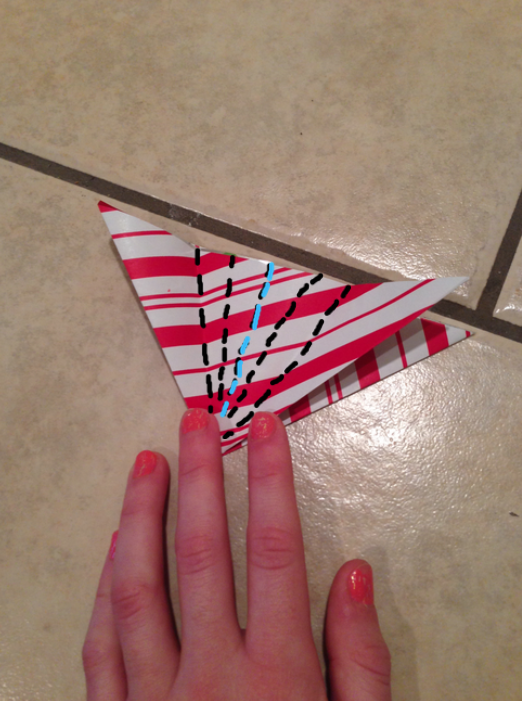
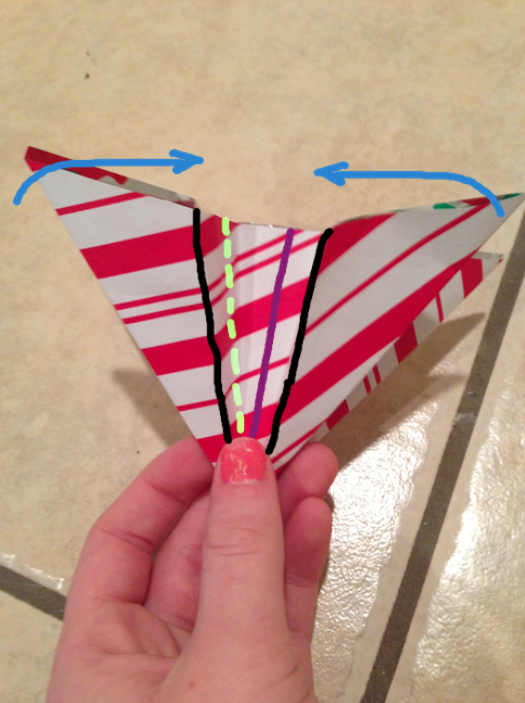
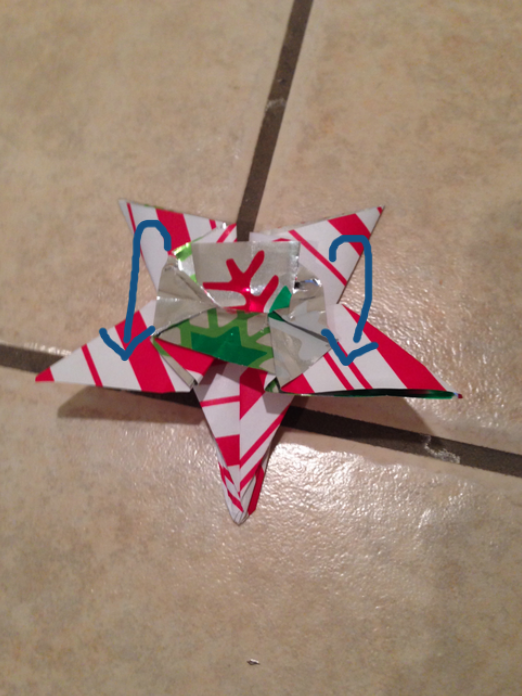
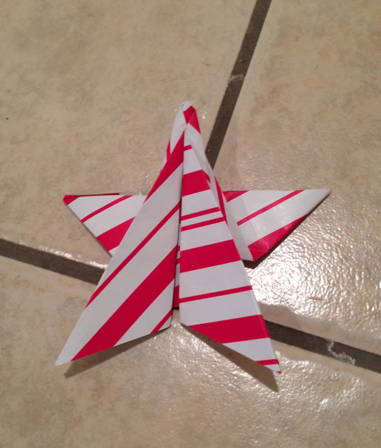
To begin, you’ll need to cut the paper into perfect squares. You can make the squares as big or small as you like, but I kept my squares around 4×4 inches. Any origami design can be used, but I chose to make stars.

Screen shot 2013-12-25 at 12.21.54 AM
Photo by Sophie Whyte
Start by folding the square of wrapping paper in half, then in half again. Look at the black dotted lines (which I added digitally) as guidelines for where you should fold.
Screen shot 2013-12-24 at 11.47.27 PM
Photo by Sophie Whyte
Flip the paper square over and make the same folds, but diagonally this time. Follow the blue dotted lines as guidelines for where to make your folds.
Screen shot 2013-12-24 at 11.50.28 PM
Photo by Sophie Whyte
By using the creases you already made as guides, fold your square into a triangle which can be viewed from four sides (kind of like a small tent).
Screen shot 2013-12-25 at 12.22.11 AM
Photo by Sophie Whyte
Screen shot 2013-12-25 at 12.22.32 AM
Photo by Sophie Whyte
This part is a tad confusing. You will be folding the paper on either side of the blue dotted line (and you will make these folds twice, once on each side of the paper triangle). The blue dotted line should already be made for you, but you will need to fold your paper at the black dotted lines at this time. Flip your paper triangle over and create the same folds on the opposite side.
Screen shot 2013-12-24 at 11.54.50 PM
Photo by Sophie Whyte
With these creases made, you will fold the paper (on each side) so that the black lines touch each other and touch the purple line as well. The purple line is the crease that was already made (it was the blue dotted line in the previous picture). The yellow dotted line is the set of folds between the black and purple lines, and this yellow line will not touch either the purple or black line.
Screen shot 2013-12-25 at 12.00.43 AM
Photo by Sophie Whyte
You should end up with this folding formation, which looks somewhat like a paper airplane.
Screen shot 2013-12-25 at 12.22.43 AM
Photo by Sophie Whyte
Take your little airplane and fold two ends (out of the total four) so that they are reversed. It is only necessary to do this once, on one of the two sides. You will see some of the inside wrapping paper, but it won’t matter since this is the back. When you flip the creation over, it should resemble a star.
Screen shot 2013-12-25 at 12.02.12 AM
Photo by Sophie Whyte
 
Screen shot 2013-12-25 at 12.22.51 AM
Photo by Sophie Whyte
You’re done! You could make a small hole in the top to thread some string through and make an ornament. Also, you can leave the star as-is and use it as a gift or small decoration. It’s all up to you how you use your holiday origami creation.
By Sophie Whyte

View Comments (1)
More to Discover

Comments (1)

All Bearing News Picks Reader Picks Sort: Newest

Your email address will not be published. Required fields are marked *

  • C

    Caylea EricksonApr 9, 2014 at 1:44 pm

    I really like the cute DIY stuff on the website, keep it up!

    Reply