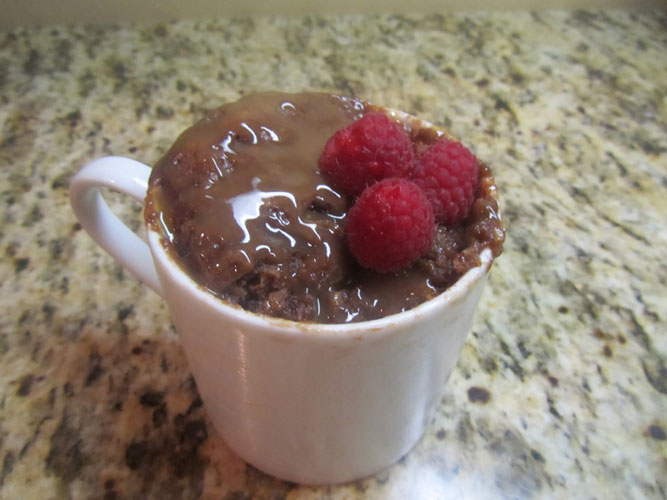
Following a busy, stress-filled day at school, I find it difficult to unwind and immediately get started on homework. I typically end up browsing through Pinterest, which ultimately leads to my discovering of a new craft that I am bound to try out.
This week’s regular scroll through pins led me to a delicious looking cake in a mug recipe that seemed too simple to resist. The description on the pin explained that this recipe was the perfect cake in a mug recipe out there, and would lead to a rich, chocolate dessert in an instant.
So I grabbed a big mug, and prepared to make a new kind of cupcake – the cake in a cup!
What you will need:- Mug
- Microwave
- 4 tablespoons of flour
- 4 tablespoons of sugar
- 1 tablespoon of unsweetened cocoa
- 2 tablespoons of whisked egg
- 3 tablespoons of milk
- 3 tablespoons of oil
- 3 tablespoons of chocolate chips
- Splash of vanilla
- Maybe some caramel or raspberries to top it off
To make this quick and easy cake:
- Add all of the dry ingredients (flour, sugar, cocoa) into the mug and mix them together.
- Add the 2 tablespoons of egg into the mug and be sure to stir thoroughly until everything is well-blended. The mixture should be pretty pasty at this point.
- Next, stir in the milk and the oil to the concoction.
- Lastly, add in the chocolate chips and the vanilla extract and stir well.
- Then, the recipe suggests that you microwave for 3 minutes in a 1000 watt microwave or 4 minutes for a 700 watt microwave oven. The cake should start to crown over the top of the mug, but it will collapse once the heat stops.
- Carefully take out your cake, and allow it to cool for about 2 minutes. Finish off your dessert with any toppings. Then, dig in and enjoy!
In addition to these steps, there were some tips that I would like to note that the author of the recipe did mention, and I also found helpful in carrying out this recipe. First of all, it is important to use the exact amount of flour, if less is used, then the cake wouldn’t have as good of a “cake” texture, and if too much is used, then extra flour will sit at the bottom. Also, another measurement that is important to keep accurate is amount of egg. One egg would be too much, one egg white would be too eggy, and one yolk would be much too dense, according to this author who tested out various recipes, but two tablespoons was just perfect in this case that I tried out. Also, the recipe noted that if you desired a fudgier version of this cake, you can omit the egg from the recipe altogether.
While I was trying out this recipe, I realized a little too late that I didn’t have any chocolate chips in my pantry, but using pieces of a chocolate candy bar worked just as well, if not even better, in my opinion.
Having completed this cake in a mug recipe, I can now say that the recipe is just as simple as it sounds. In my opinion, making this cake for myself was even simpler than making a cake out of a box. The fact that I was able complete the entire project from getting out the ingredients to eating the cake in about 10 minutes makes this DIY all the more successful in my opinion.
By Manal Salim























































Nicole Schroeder • Feb 23, 2014 at 10:25 pm
This cake looks so good! I hope I can try it sometime soon– it would be a perfect Friday night chocolate fix after a stressful week at school!